
How to Finish the Back of Your Cross Stitch Hoop with Felt
Give your cross stitch piece a beautiful, professional finish! This easy method will help protect the back of your work and make your hoop ready for display or gifting.
✂️ What You’ll Need
✅ Your finished cross stitch project in a wooden or plastic embroidery hoop
✅ Scissors
✅ Needle
✅ Strong thread (sewing thread or embroidery floss or dental floss!)
✅ Felt sheet (any color you like)
✅ Fabric pen or chalk (optional, for tracing the felt circle)
🪡 Step-by-Step Instructions
1. Place your project in the hoop
-
Center your stitched design in the hoop so it looks just right.
-
Tighten the hoop’s screw until the fabric is firm and smooth, but not stretched out of shape.


2. Trim the excess fabric
-
Leave about 1/2 to 1 inch (1.5-2.5 cm) of Aida fabric sticking out beyond the hoop.
- Carefully trim around the hoop, following its shape.

3. Sew a running stitch around the edge
-
Thread your needle with a long piece of thread or embroidery floss (double it up for strength if you'd like). I personally like to use dental floss for this job.
- Starting anywhere, sew a simple running stitch close to the edge of the trimmed fabric — go in and out about every 1/4 inch (6 mm).

4. Gather the fabric
-
When you’ve stitched all the way around, gently pull the thread to gather the fabric towards the center of the hoop’s back.
-
Tie a secure knot so the fabric stays neatly gathered.
5. Cut a felt circle
-
Place the hoop on your felt sheet and trace around it.
-
Cut just inside your trace line so the felt circle is slightly smaller than the hoop’s edge, this way it won’t stick out.
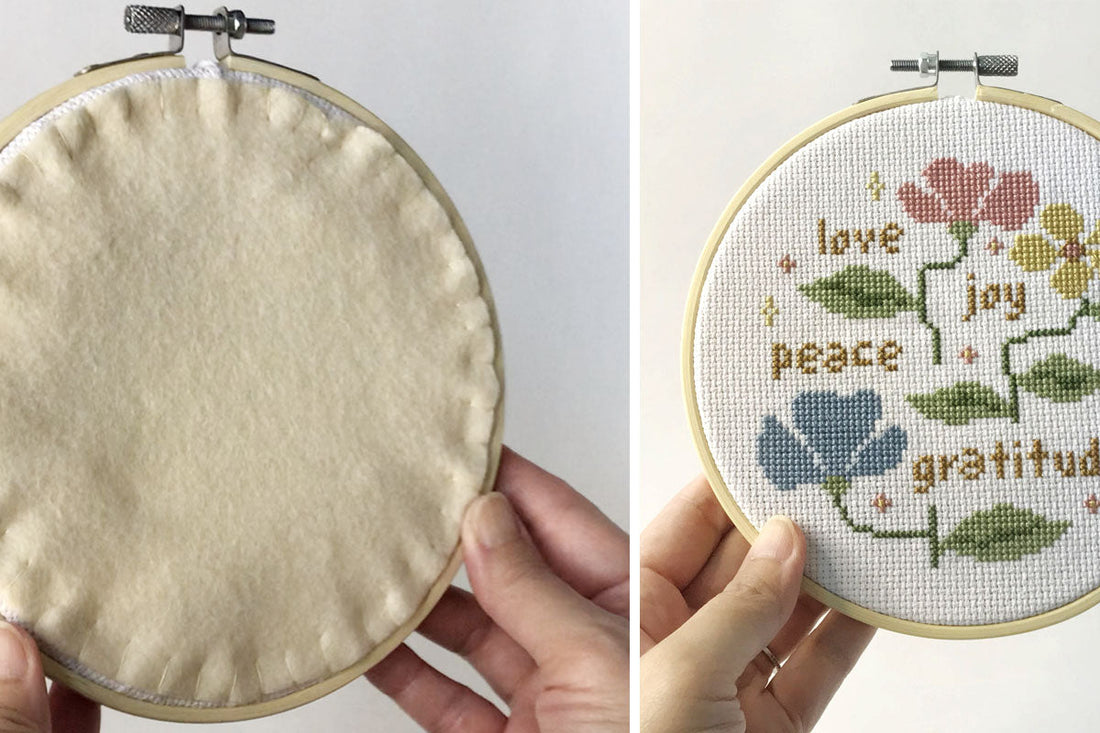
6. Attach the felt with blanket stitch

-
Thread your needle with embroidery floss (use all 6 strands for a nice look).
-
Place the felt circle over the gathered fabric.
-
Start your blanket stitch at any point:
-
-
Bring your needle up through the edge of the felt and the fabric underneath.
-
Before pulling the stitch tight, pass the needle through the loop of the thread to create that neat blanket edge.
- Continue stitching all around, spacing your stitches evenly.
-
Bring your needle up through the edge of the felt and the fabric underneath.
✅ That’s it!
You now have a clean, finished back that hides the gathered fabric and protects your stitches, perfect for hanging or gifting!
🌟 Why use this method?
✨ It gives your hoop a polished, professional look.
✨ The felt protects your stitches from dust and damage.
✨ The blanket stitch adds a lovely decorative touch.


