
How to Do a Basic Cross Stitch (And Keep the Back Neat!)
Cross stitch is one of the simplest and most relaxing embroidery techniques, making it perfect for beginners! This guide will walk you through how to create a basic cross stitch, step by step, while keeping the back of your work tidy.
What You’ll Need
Before you start, make sure you have:
✔️ Aida fabric (your cross stitch pattern will specify the count)
✔️ Embroidery needle (size 24 or 26 is ideal for beginners)
✔️ Embroidery floss (separated into the correct number of strands)
✔️ Embroidery hoop (optional but helpful for keeping fabric taut)
✔️ Scissors
Step 1: Thread Your Needle
Most cross stitch patterns use two strands of embroidery floss. Separate your strands, cut a length of about 18 inches, and thread your needle. If using the loop start method, you can use one long strand (36 inches) folded in half.
Step 2: Find Your Starting Point

Locate the center of your fabric by folding it in half twice. Match this to the center of your pattern.
Step 3: Make Your First Cross Stitch

- Bring the needle up from the back of the fabric to the front at the bottom left corner of a square.
- Insert the needle down into the top right corner of the square, forming a diagonal stitch.
- Bring the needle up through the bottom right corner of the square.
- Insert the needle down into the top left corner to complete the cross.
This creates an "X" shape, your first cross stitch!
💡 Tip: Always stitch in the same direction (e.g., bottom left to top right first) for a consistent, neat look.
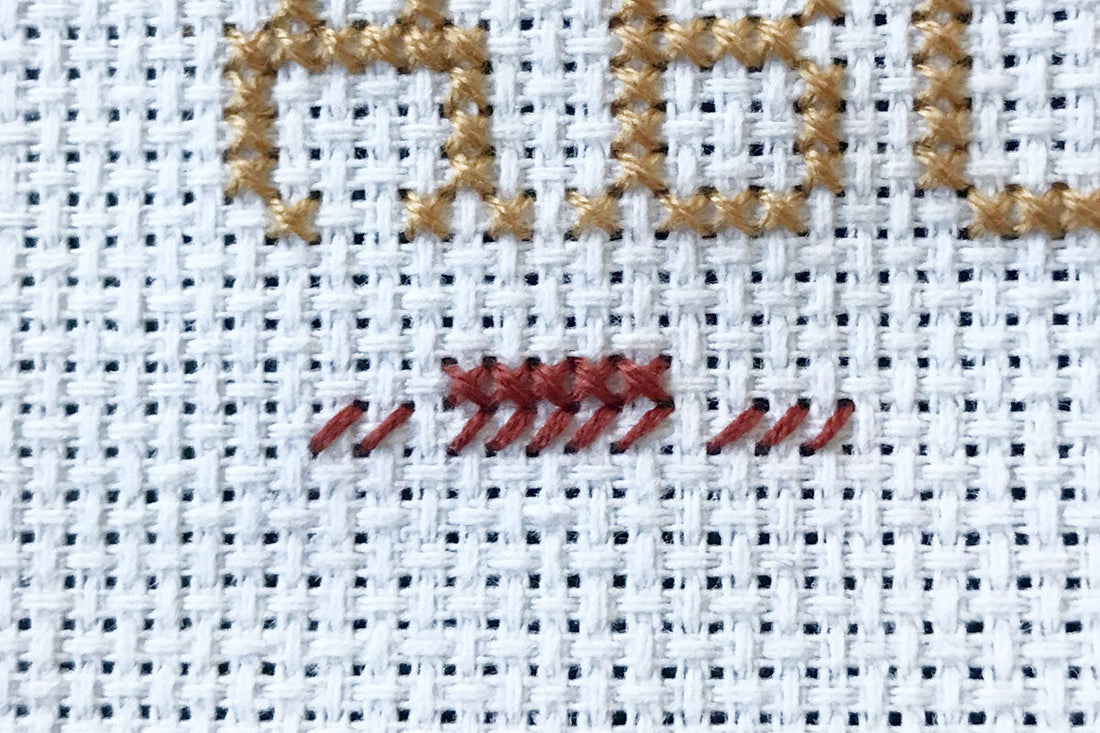
Step 4: Continue Stitching in Rows
For multiple stitches in a row, you can:
- Make a row of half stitches (/////) first, then go back to cross them (\\\\).
- Complete each "X" before moving to the next stitch.
Both methods work! Choose what feels best for you.
Step 5: Ending Your Thread

When you have a few inches of thread left, secure it by weaving it under the back of a few stitches. Avoid knots for a clean finish.
How to Keep the Back of Your Cross Stitch Neat
Keeping the back of your cross stitch tidy not only makes your project look polished but also prevents bumps and tangles that can affect your stitching.
✨ Avoid Skipping Around
Try to stitch in a logical order without jumping across large gaps in your fabric. This keeps the back smooth and prevents loose threads from showing through the front.
✨ Don’t Knot Your Thread
While knots might seem like an easy way to secure your thread, they can create lumps that make it harder to stitch smoothly. Instead, use the loop start method or weave your thread under a few existing stitches on the back.
✨ Keep Your Tension Even
Pull your thread snugly but not too tight, this prevents puckering or loose stitches.
By following these simple habits, the back of your cross stitch will look as neat as the front!
You're Ready to Stitch!

Now that you know how to make a basic cross stitch and keep the back of your work tidy, you’re ready to bring your pattern to life! Take your time and enjoy the process.
Happy stitching! 🧵✨


